Cerebrium setup
If you don’t have a Cerebrium account, you can run the following in your cli:- main.py - Our entrypoint file where our code lives.
- cerebrium.toml - A configuration file that contains all our build and environment settings Add the following pip packages near the bottom of your cerebrium.toml. This will be used in creating our deployment environment.
Livekit Setup
We will be using Livekit to build this example. Livekit is a platform that makes it easy to build real-time audio and video applications. To start, we first need to create a LiveKit account. You can do this by signing up to an account here (they have a generous free tier). Once an account is created, run the following commands to install their cli package (Homebrew can be installed from here).
Twilio Setup
To setup a outbound calling agent, we need to setup a SIP trunk in Twilio. A SIP trunk in Twilio is like a virtual phone line that connects your app to the traditional phone network, allowing it to make outbound calls to any phone number. It ensures your calls are routed properly and reliably, acting as the bridge between your app and the global telephony system.- Log in to your Twilio Console: Go to Twilio Console and log in with your credentials. If you don’t already have an account, create one.
- Add Phone Numbers: Under the “Develop” tab is the “Phone numbers” section. Navigate to “Active numbers” and purchase a number if you don’t already have one. Toll free numbers won’t work for our use case, so ensure that a “Local” number exists.
-
Install the Twilio CLI and authenticate your CLI:
-
Create a SIP trunk:
The domain name for your SIP trunk must end in pstn.twilio.com. For example to create a trunk named My test trunk with the
domain name my-test-trunk.pstn.twilio.com, run the following command:
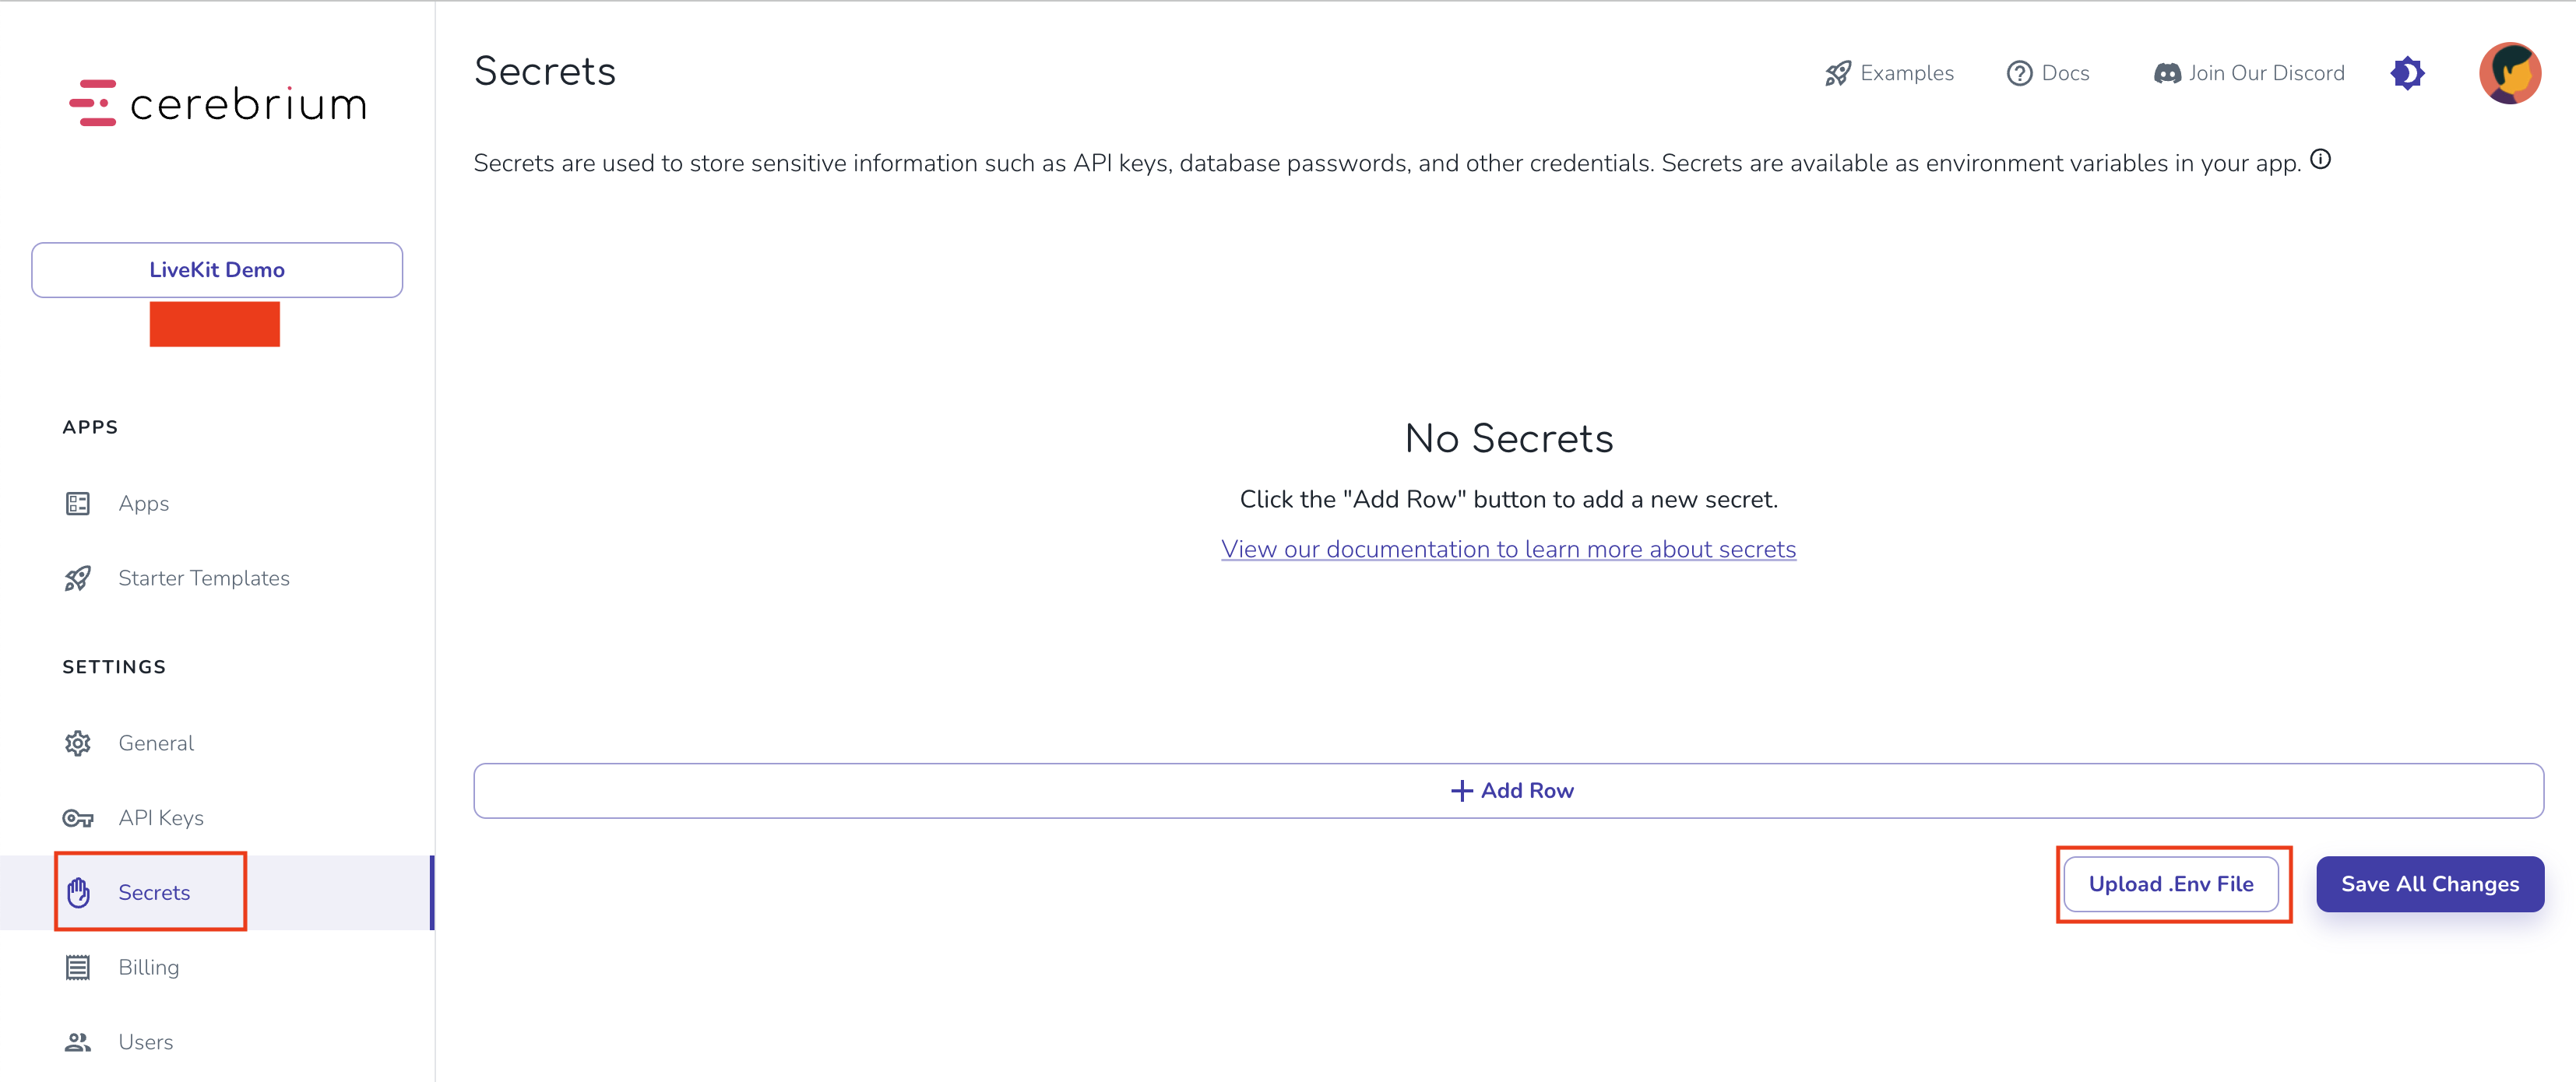
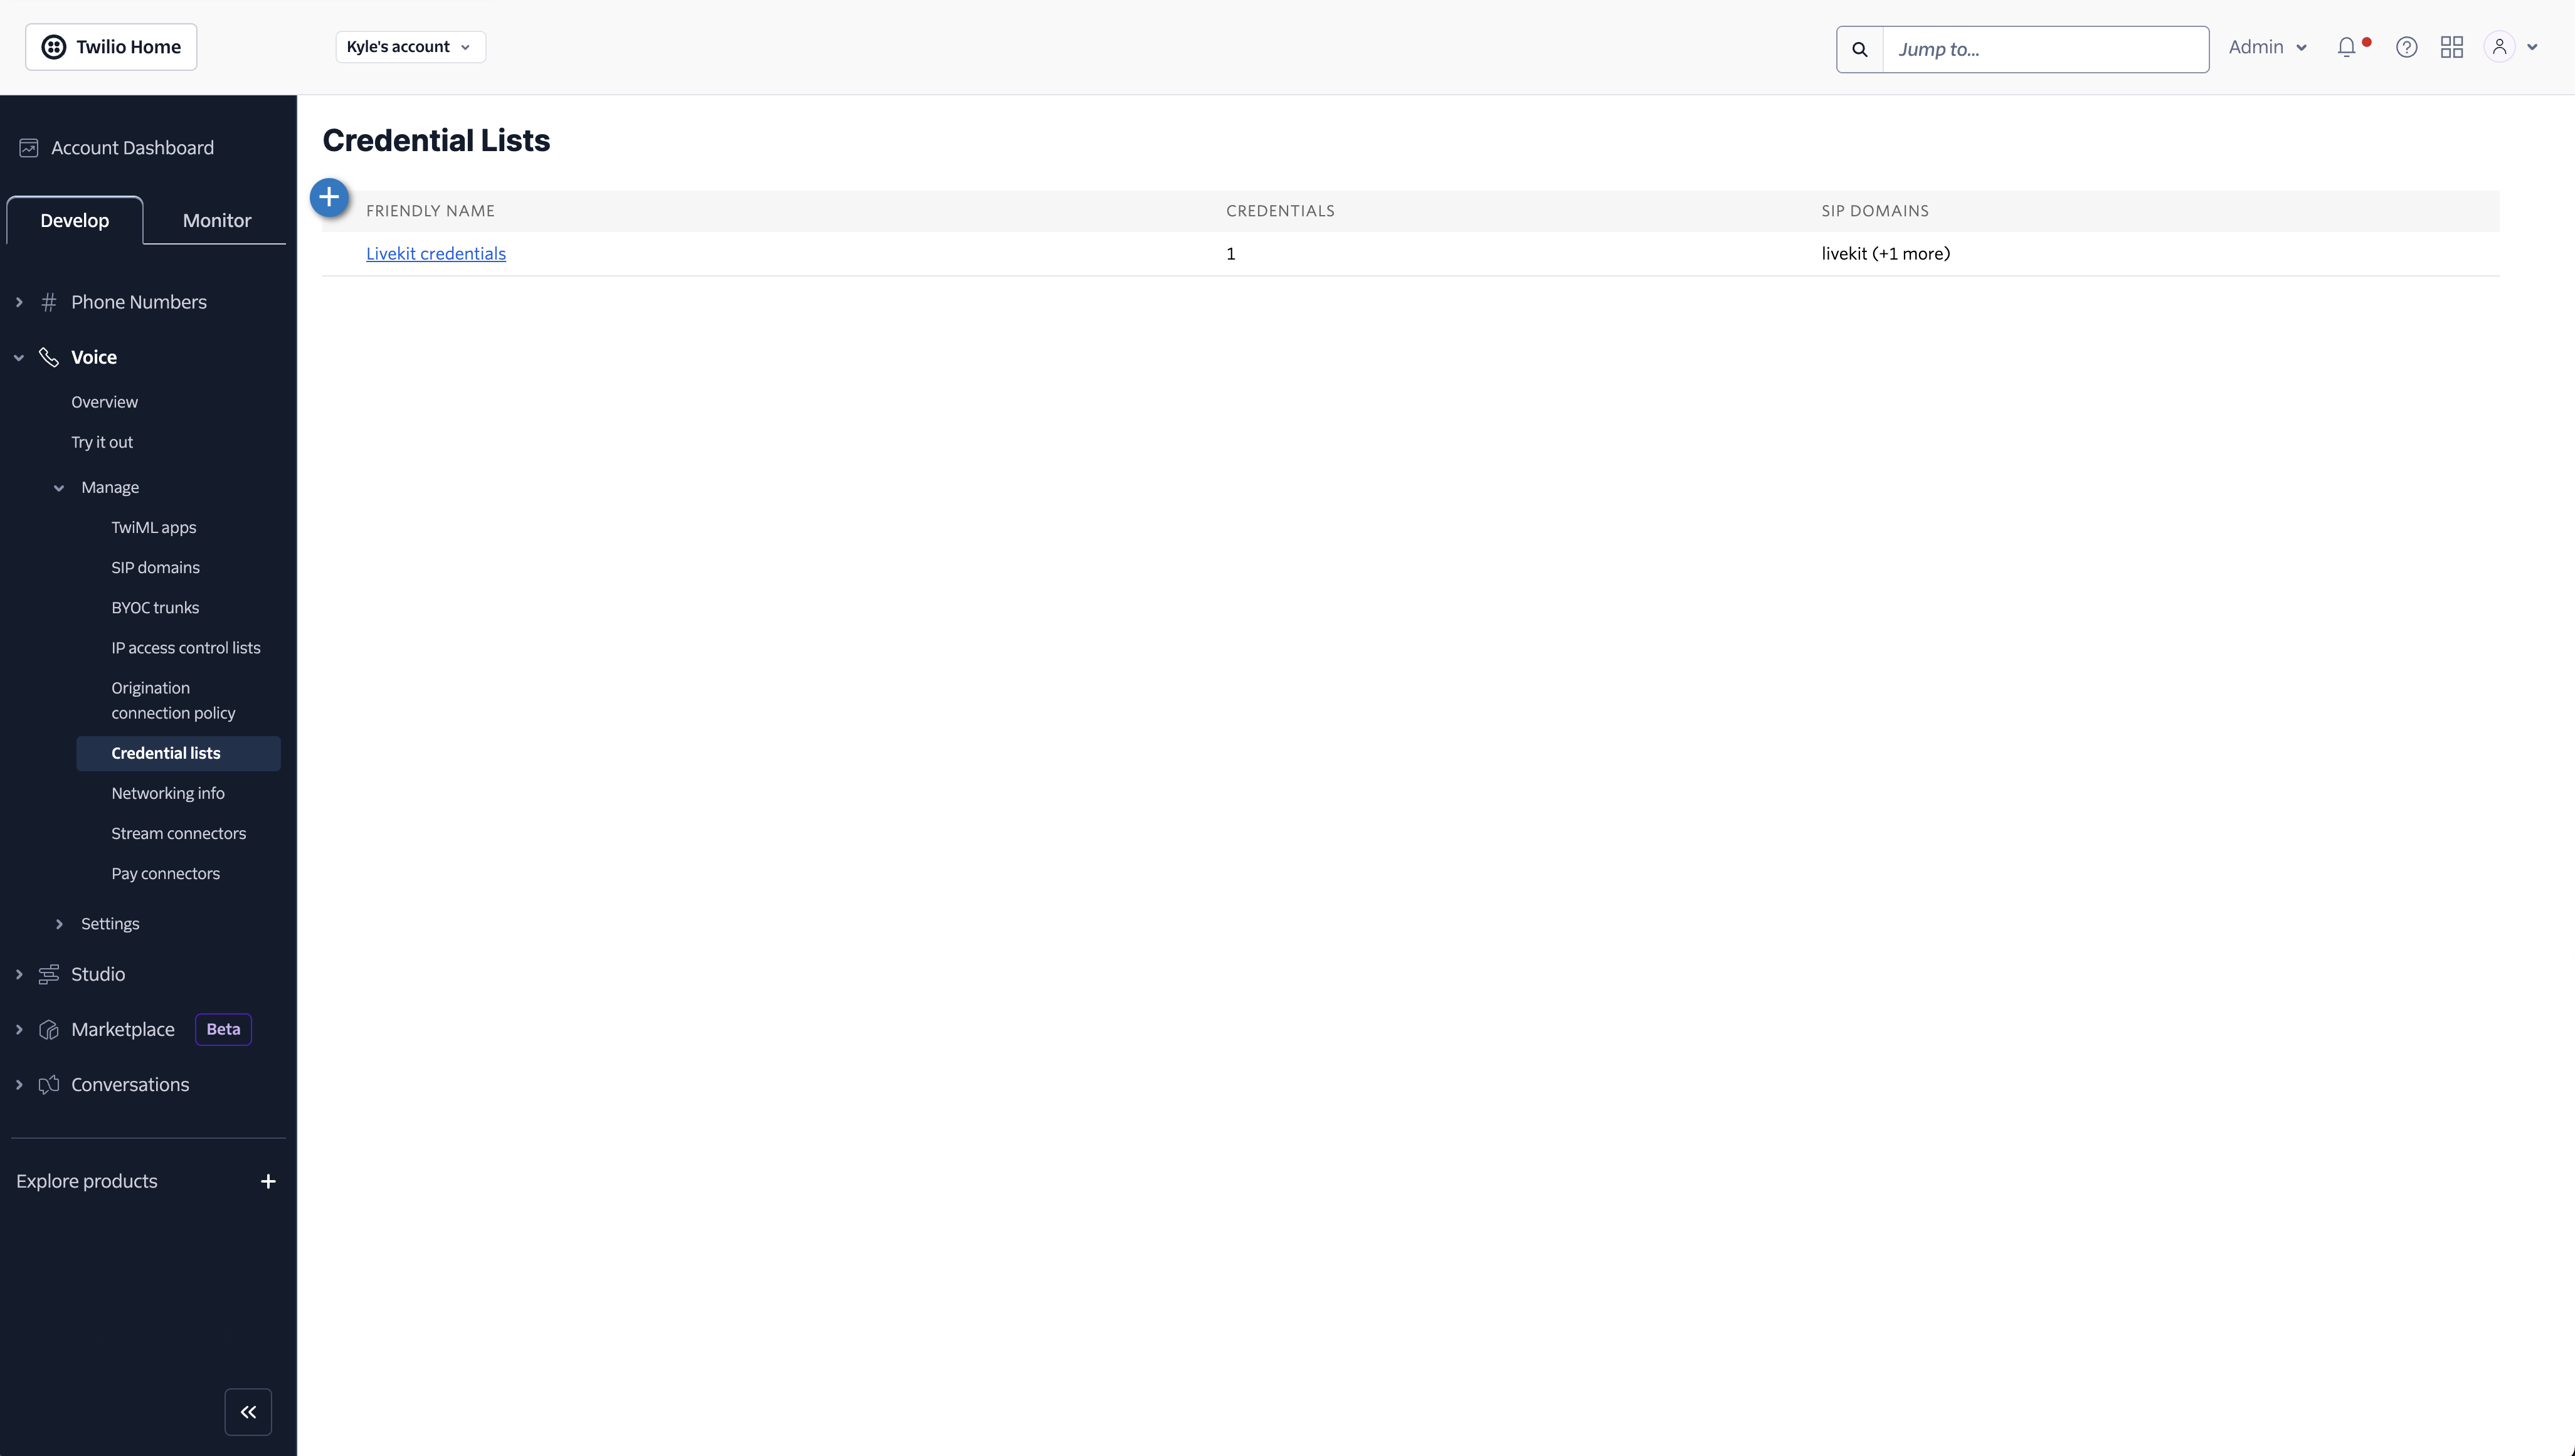
- Create your credentials: To secure our SIP trunk, we must first create a credential list in your Twilio console dashboard. Navigate to “Voice”, and then “Manage”, and then “Credential lists”. Click the plus icon and add a friendly name, together with a username and password (Note: We’ll need these later, so be sure to remember them or store them in a place where you can retrieve them later)
- Associate your SIP with your newly created credentials. Copy the values for your Account SID and Auth Token from the Twilio console.
outbound-trunk.json using the Twilio phone number you purchased in the previous step, trunk domain name, and username and password.
lk sip outbound create outbound-trunk.json
The output of the command returns the trunk ID which we will need later.
Services setup
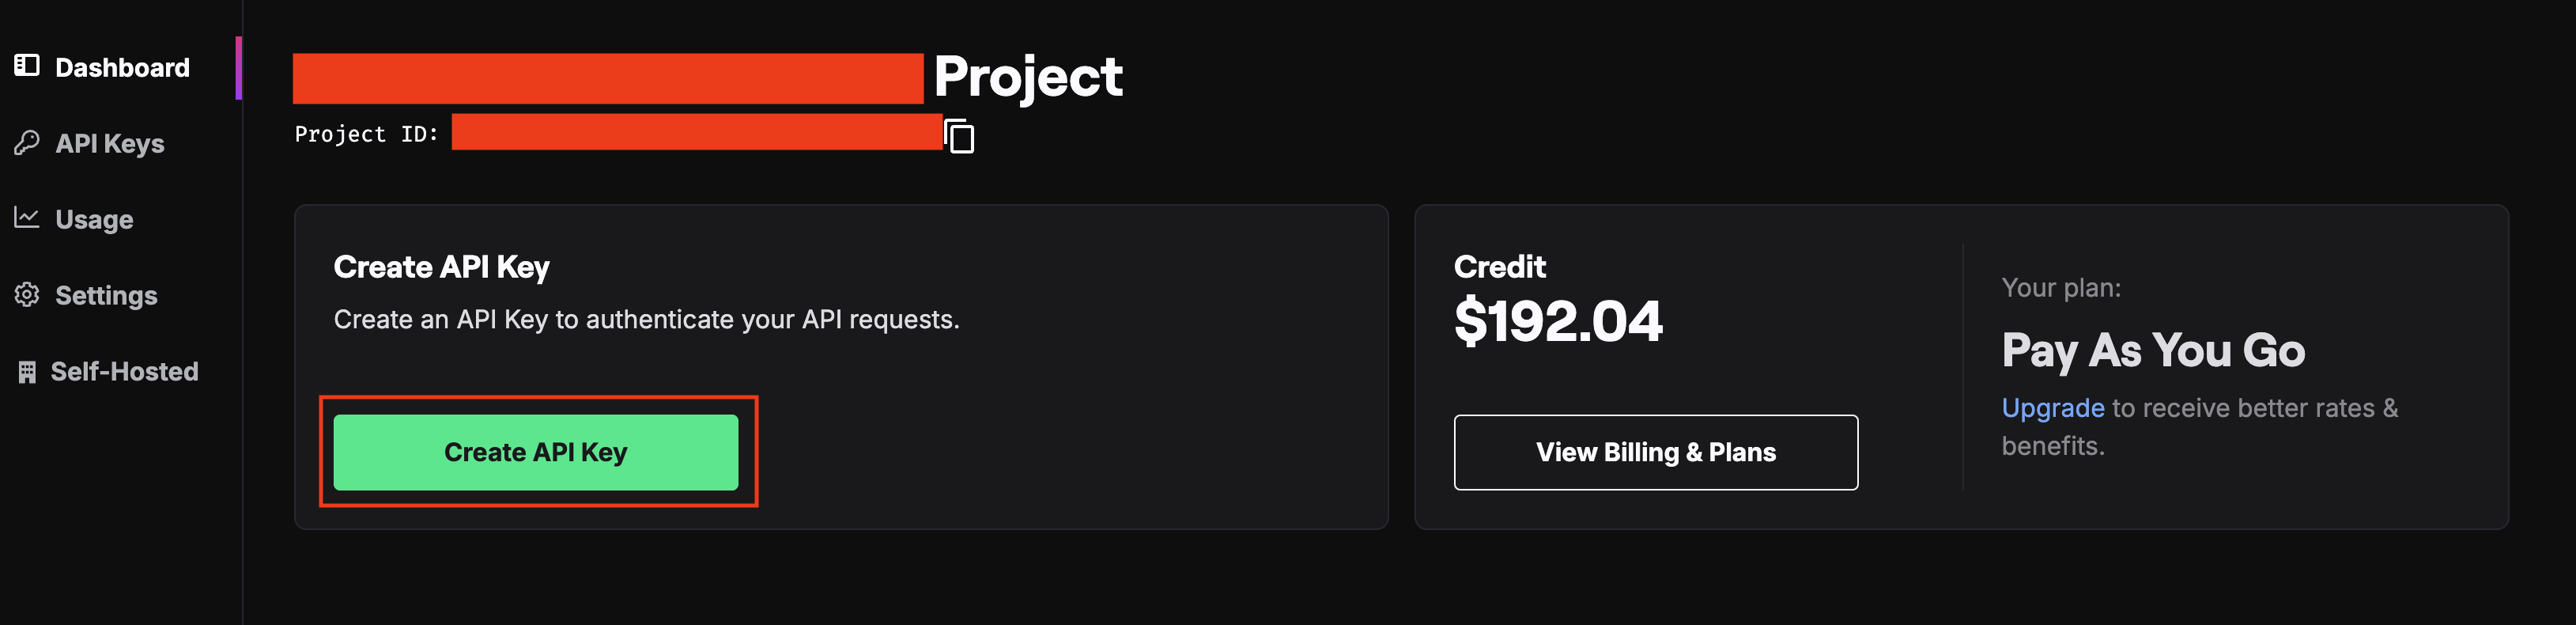
For our solution, we will use the following services to create our outbound AI agent: Below I will walk you through the setup of each service - they all come with a generous free tier:- Deepgram
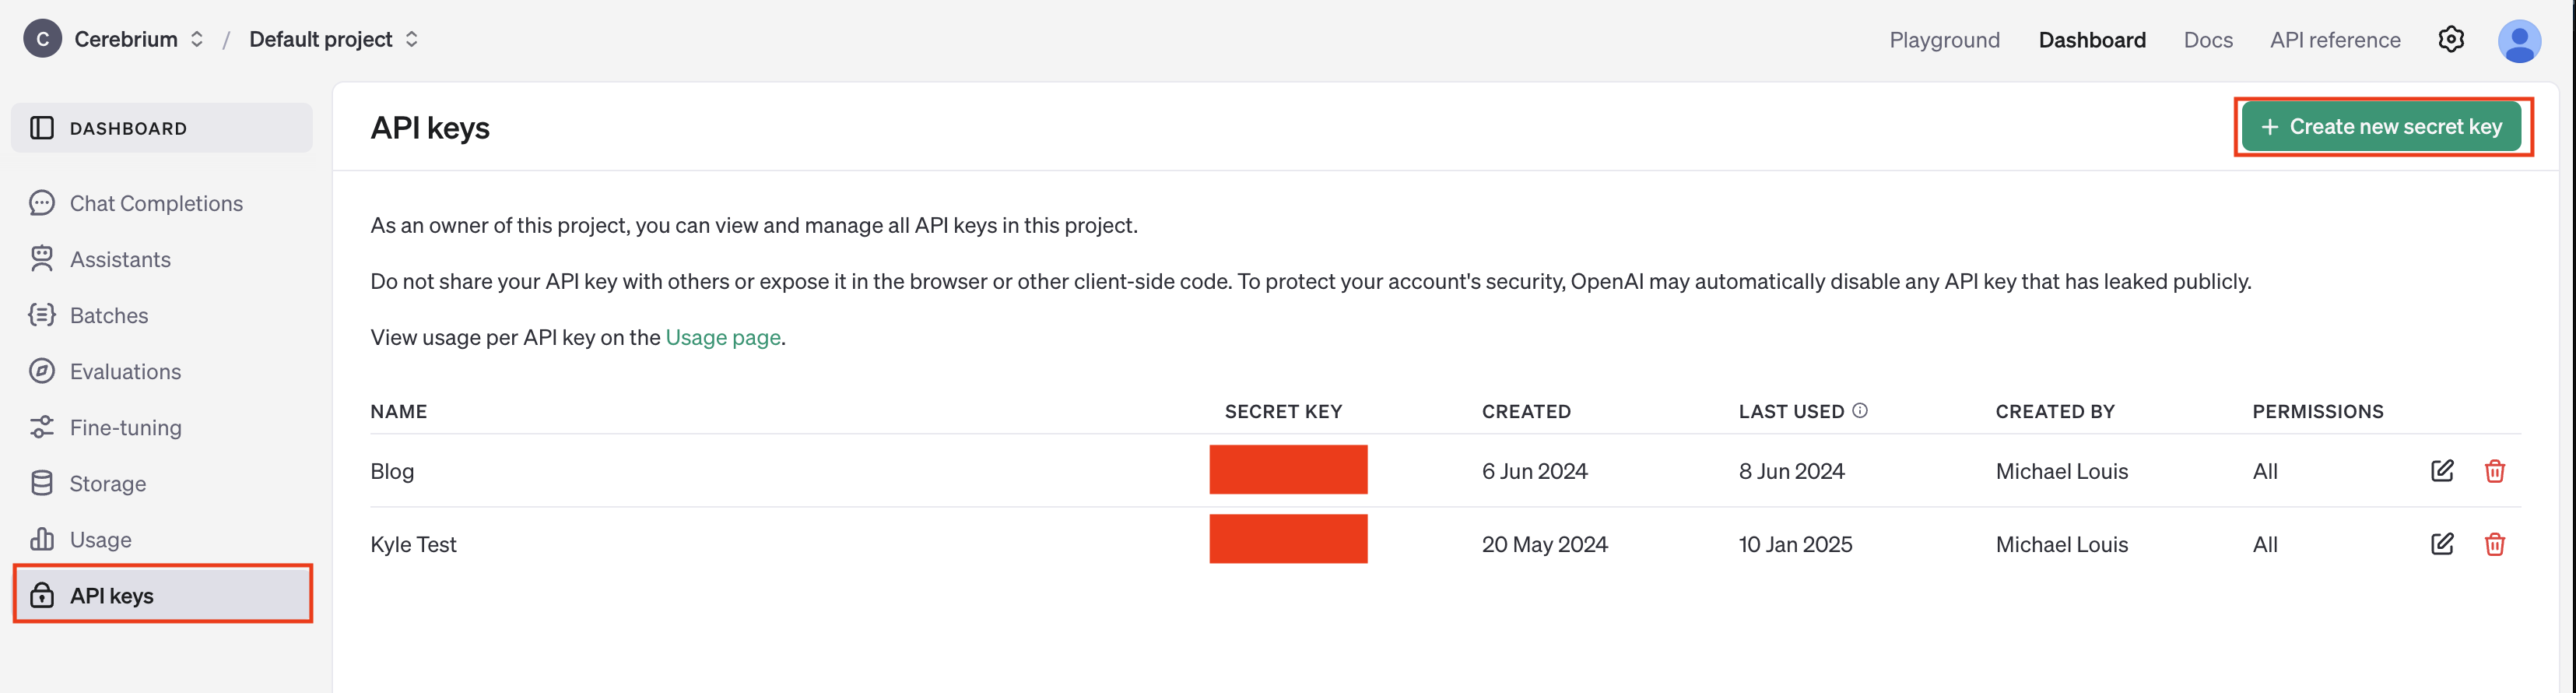
- OpenAI
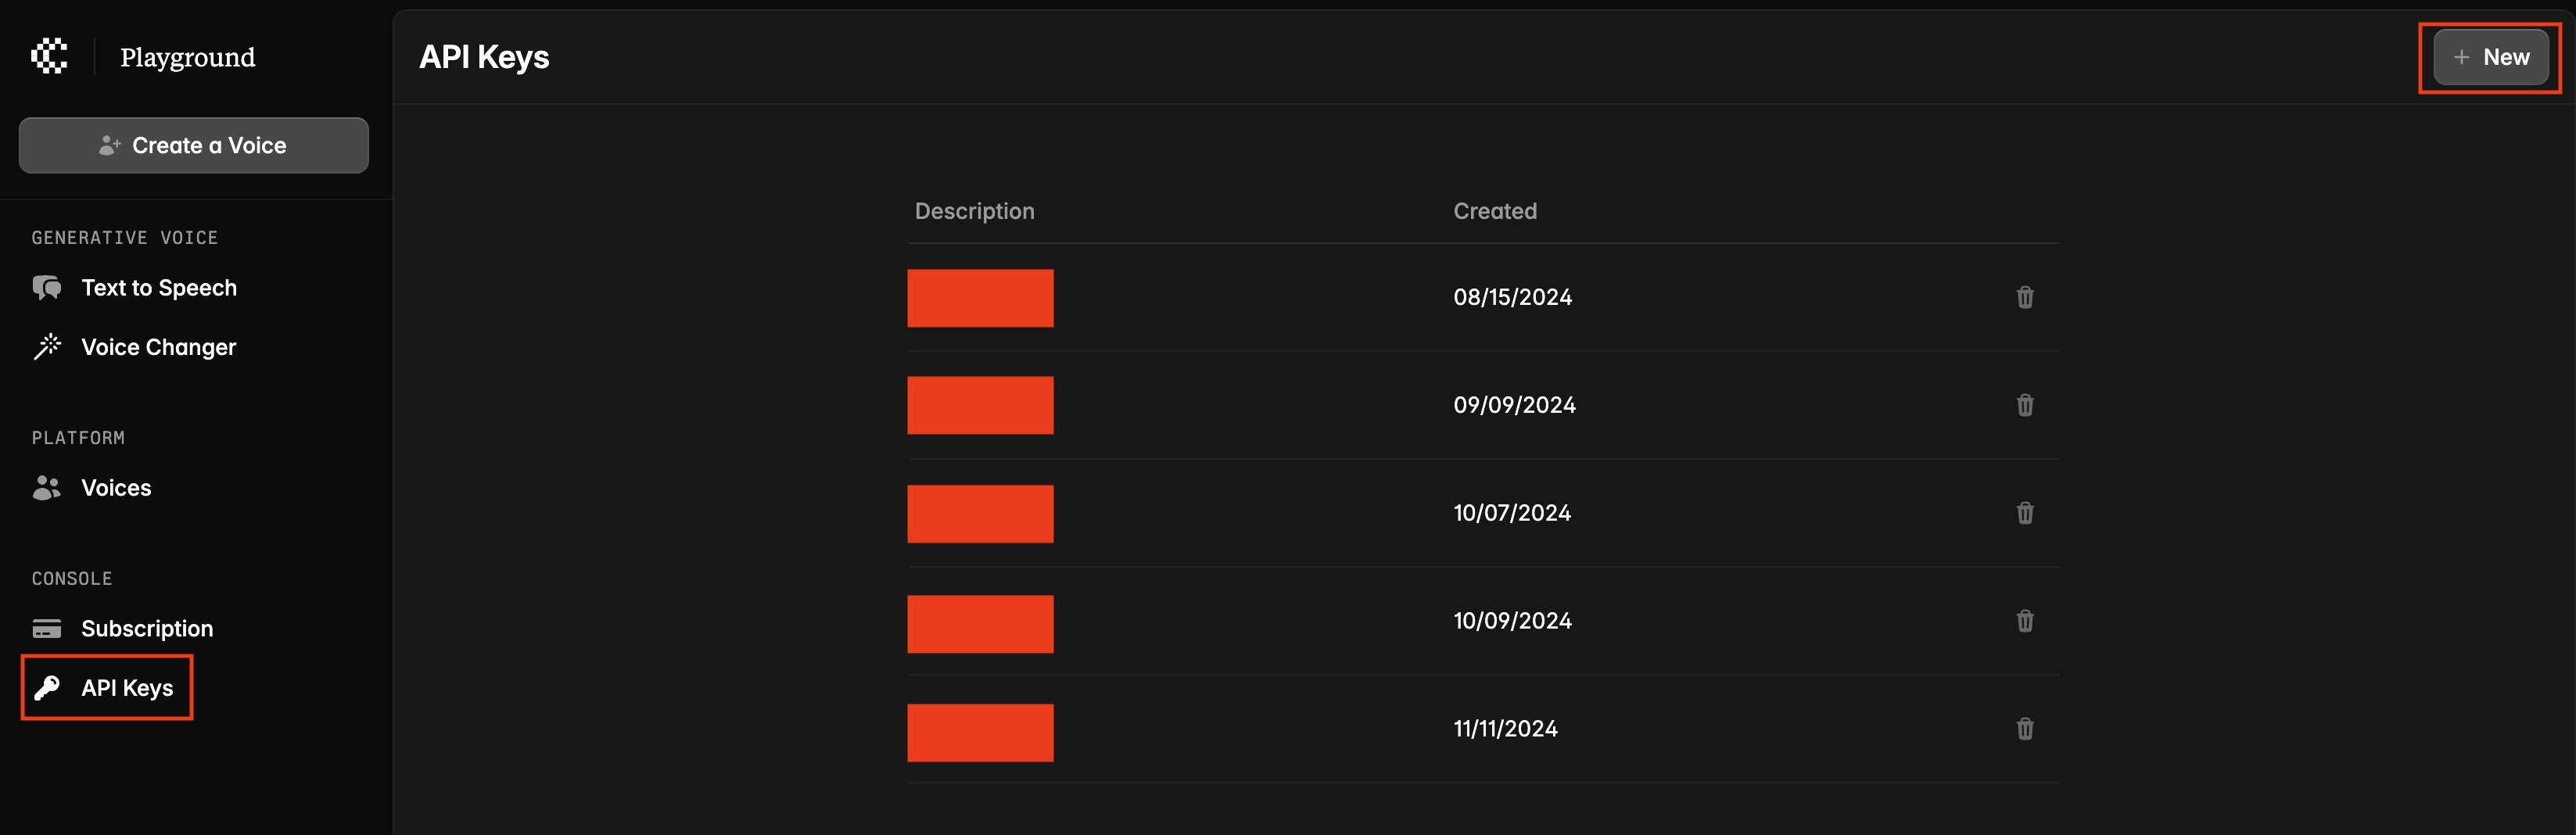
- Cartesia
pip install -r requirements.txt. I will explain why we need FastAPI later.
Let us now get started on our code. Create a file called main.py where we will write the code for our agent. Your directory structure should look like this:
- main.py
- .env
- requirements.txt
- outbound-trunk.json
- We specify our initial system prompt to guide our AI agent
- We list the services we are using to create our AI agent as well as the settings for how long it must wait until it replies.
- We collect metrics about our call that we display throughout to track performance and when the call ends we log a summary of those metrics.
- Lastly, we start the agent with an initial greeting to the user.
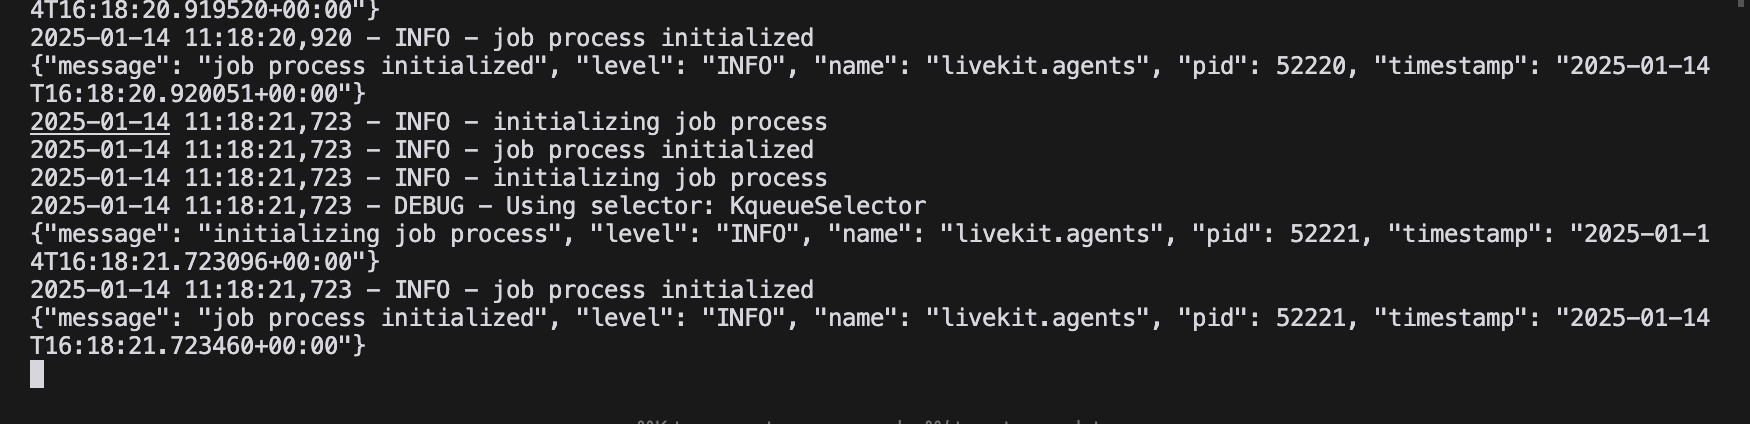
python main.py in one terminal - this will keep the agents running as a open process and you should see the output as below.
python test.py. This will initiate a call to the phone number you provided. Note,
you can’t make calls internationally but only to the region your number is purchased from.
With this now working locally, let us deploy it on Cerebrium to make it production ready with autoscaling capabilities.
Deploy on Cerebrium
We need to specify our Cerebrium environment to deploy our app. We will be doing this using a Dockerfile:cerebrium.toml, edit the values with the following contents: